.png)


How to Master Swing Gate Installation: 5 Steps that Guarantee Results
- Jake Bunston
- Nov 4, 2025
- 9 min read

Why Professional Swing Gate Installation Matters More Than You Think
A professional swing gate installation is a multi-stage process requiring precise planning, foundation work, and expert alignment to ensure a secure, long-lasting entrance. While it might seem like a straightforward DIY project, it sits at the intersection of carpentry, metalwork, concrete, and electrical systems.
Common DIY pitfalls include inadequate concrete footings that cause posts to shift, incorrect spacing that makes gates bind, and undersized hinges that lead to sagging. A poorly installed swing gate isn't just an inconvenience; it's a security weakness and a potential safety hazard. Industry standards like UL325 exist because automated gates can cause serious injuries if not installed correctly.
Melbourne's variable soil and weather add another layer of complexity, as a foundation that works in firm clay may fail in sandy soil.
I'm Jake Bunston, director of Make Fencing. Over the past decade, I've overseen hundreds of swing gate installations across Melbourne. I've learned that the difference between a gate that works flawlessly for 20 years and one that becomes a constant headache comes down to decisions made in the first few hours.
This guide walks through five proven steps, highlighting the challenges at each stage. You'll understand not just how swing gates are installed, but why professional installation is often the smarter investment for your property and peace of mind.
Step 1: Planning and Key Decisions
Before a single hole is dug, thorough planning is the most critical step in any swing gate installation. This is where professional expertise prevents costly mistakes and ensures your gate functions perfectly. It involves a detailed site assessment and making key choices that define the project.
At Make Fencing, we start with a comprehensive site evaluation. We examine your driveway, considering the overall layout, existing fences, and potential obstructions. We also assess the 'squareness' of your entrance to ensure seamless operation, especially with automatic systems. Slope and grade analysis is crucial, as the gradient of your driveway impacts whether a gate can swing inward or outward and if specialised hardware like rising hinges is needed.
Choosing Between a Single and Dual Swing Gate
One of the first decisions is whether to opt for a single or a bi-parting (dual) gate. A single swing gate uses one large panel and is often economical for driveways up to 12 feet wide. However, it requires substantial swing clearance behind it. If you have a parked car or garden in that arc, the gate won't work.
For wider entrances (over 14 feet), a bi-parting pair of gates is highly recommended. This design uses two smaller panels that meet in the middle, dramatically reducing the required swing radius and placing less strain on the posts and hinges.
Getting the measurements right is critical. For a single gate, you typically add 6 inches to the panel width for hinge and opening gaps. For dual gates, you add around 11 inches to the combined width. These calculations vary with post thickness, which is why professional measurements are so important. Our team excels at creating Custom Metal Gates for Driveways and Custom Wood Driveway Gates that fit perfectly.
Inward vs. Outward Swing: The Impact of Your Driveway
Most automatic gates are set to "pull to open," swinging inward toward the property. This is generally safer and avoids obstructing public footpaths, a key consideration in many Melbourne suburbs.
However, your driveway's layout is the deciding factor. If you have a steep upward slope towards your house, an inward-swinging gate will scrape the ground. In this scenario, an outward-swinging gate might be necessary, provided there's enough clearance and it doesn't create a hazard. A professional assessment catches these issues before the posts are cemented in place.
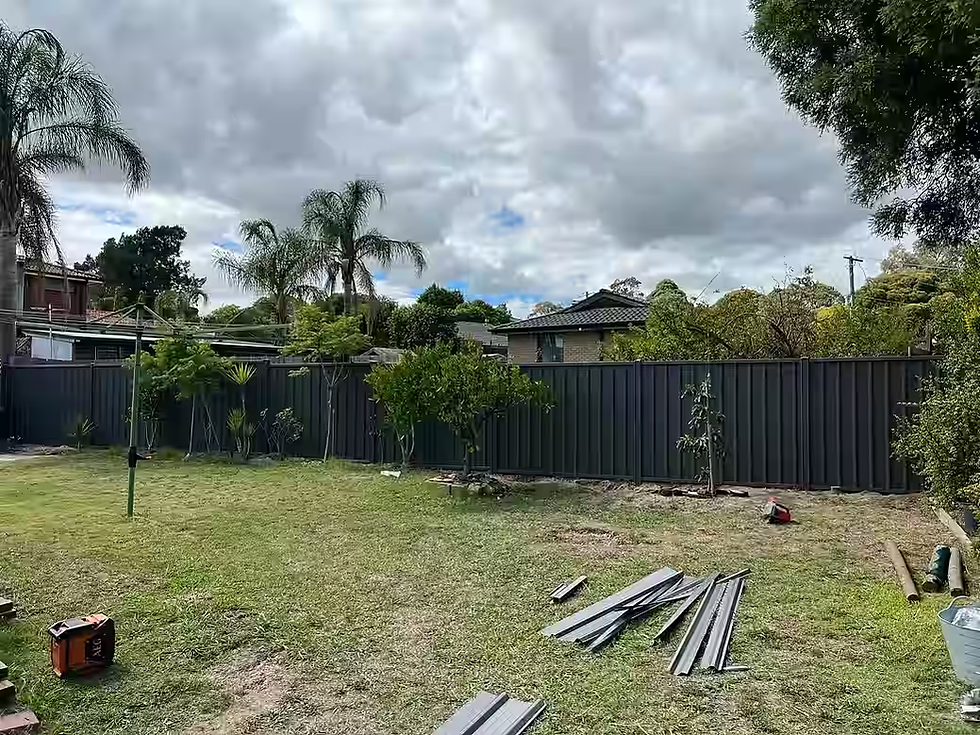
Step 2: Site Preparation and Foundation
The long-term stability of your swing gate depends entirely on what's below the surface. A solid foundation is non-negotiable, especially in Melbourne where ground conditions vary. This stage is labour-intensive and requires absolute precision, making it a key part of any successful swing gate installation.
The Importance of a Proper Concrete Foundation
Gate posts bear significant loads, not just from the gate's static weight but also the dynamic forces of swinging. These forces, combined with wind and weather, put enormous stress on the footings. Inadequate concrete is a common failure in DIY projects, causing posts to tilt or sink over time. This leads to a gate that binds, drags, or hangs at an angle.
Each post must be set in a substantial concrete footing that extends below the frost line to prevent ground movement. The amount of concrete depends on your gate's size, weight, and soil type. A good rule of thumb for steel gates is 100-150 lbs of concrete per foot of gate panel length. Our advice: always use more than you think you need. It's far cheaper than re-setting a failed post later. You can Calculate your concrete needs online, but our Professional Fence Installers ensure the correct amount for your specific project.
How to Properly Prepare the Site and Pour Concrete for Gate Posts
Start by clearing the site and marking the exact post locations. When excavating, dig square holes at least 36 inches deep and 24 inches wide. Square holes offer better resistance against twisting forces than round ones. For softer soils, widening the bottom of the hole creates a 'bell' shape for added stability.

Position the posts so they are perfectly plumb (vertically level) in all directions and level with each other. Use sturdy temporary braces to hold them firmly in position while you pour the concrete. Work the concrete mix around the post to eliminate air pockets. Finally, allow the concrete to cure for at least 36-72 hours before hanging the gate. Rushing this step is a recipe for failure, as hanging a heavy gate on partially cured footings will compromise the entire installation.
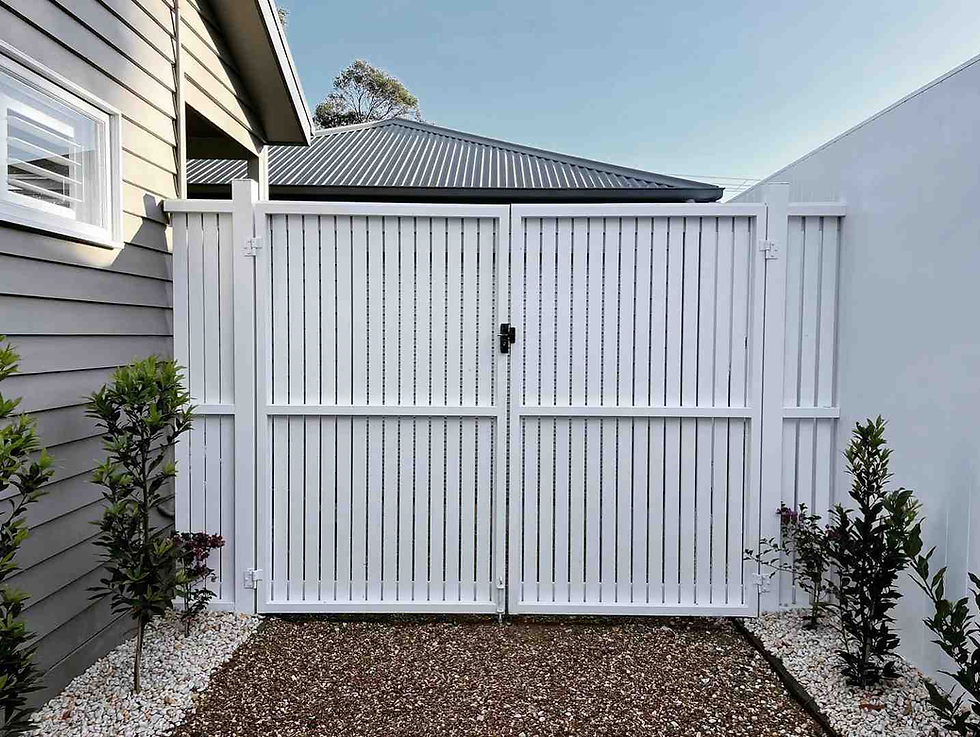
Step 3: Gate Installation
With the posts securely in place, it's time to hang the gate panels. This stage demands precision, as even a slight misalignment can lead to a gate that sags, binds, or puts excessive strain on its hardware and automation motor.
Best practices for a durable swing gate installation
To ensure a flawless swing gate installation, start with the right ground clearance. A minimum of 3-4 inches is essential to prevent the gate from jamming on uneven ground or due to seasonal ground movement.
Next, select hardware rated for your gate's weight. Undersized hinges are a common DIY mistake that causes sagging and leads to costly Fence Repairs Melbourne. For very heavy or wide gates, a gate wheel provides extra support and dramatically extends the life of the hinges.
When hanging the gate, the posts must be perfectly parallel and plumb. We use blocks and shims to hold the panel at the correct height while attaching the hinges, allowing for micro-adjustments. The gap between the gate and posts should be even, typically around 1 inch on the opening side to allow for smooth operation and thermal expansion.
A properly installed Fence Gate should feel almost weightless as it moves, and the latch should align perfectly without needing to lift or push the gate. This effortless operation is a sign of a well-balanced system that will last for decades.
For longevity in Melbourne's climate, we recommend durable materials like powder-coated aluminium, steel, or wrought iron over timber, which is prone to warping and rot. A professional installation ensures all these details are handled correctly, providing long-term value and avoiding the hidden costs and frustrations of a failed DIY project.
Step 4: Automation and Security Integration
An automated swing gate offers the ultimate in convenience and security. However, integrating an automatic opener is a technical task involving electrical wiring and precise calibration. This stage of your swing gate installation is where professional expertise is critical to ensure safe, reliable operation.
The Benefits of Automatic Swing Gate Systems
Beyond the convenience of not leaving your car to open the gate, automatic gate systems provide a significant security boost. They create a formidable barrier to unauthorised entry and can be paired with intercoms and cameras for complete access control.
Modern Automated Gates for Homes can be operated with remotes, keypads, or smartphone apps. However, the most critical aspect is safety. Professional installations must comply with UL325 safety standards, which mandate features like photoelectric sensors and force-sensing technology to prevent crushing injuries. These systems stop or reverse the gate if an obstruction like a child, pet, or vehicle is detected.
Our Gate Automation Melbourne installations always include properly calibrated safety beams and contact sensors. The challenge with DIY automation is that these systems require precise alignment and calibration. If the force settings are wrong, the gate might reverse with a gust of wind or fail to stop for a real obstruction.
The electrical work, including running power and wiring the control board, is a complex task best left to professionals. Attempting this yourself can be difficult and unsafe. A professional swing gate installation with automation guarantees a system that is tested and calibrated for safety, giving you peace of mind that your family is protected.
Step 5: Post-Installation Checks and Maintenance
A swing gate installation isn't finished once the gate is hanging. Final adjustments and regular maintenance are crucial for ensuring your gate functions flawlessly for decades. This final stage is often overlooked in DIY projects but is standard practice for professionals.
We conduct thorough final checks, verifying that the gate swings freely, latches engage smoothly, and all safety features on automated systems function correctly. We test sensors repeatedly to ensure they trigger every time an object is in the gate's path.
Essential Maintenance Tips for Swing Gates
A well-maintained gate will stand up to Melbourne's unpredictable weather for years. Maintenance is simple but needs to be consistent.
Clean and Inspect: Periodically clean your gate to remove dirt and debris. Check for any signs of rust or wear, especially around welds and hardware. Touch up any scratches on metal gates immediately to prevent rust.
Lubricate Hinges: This is the single most important task. At least twice a year, apply a quality lubricant to all hinge points to ensure a smooth swing and prevent premature wear.
Test Safety Features: For automatic gates, test the safety sensors monthly by placing an object in the gate's path to ensure it reverses. This is a vital safety check required by UL325 standards.
Keep the Operator Clear: Ensure the area around the gate operator is free of debris, insects, and overgrown plants that could interfere with its mechanism.
While these tasks are straightforward, our team can provide scheduled maintenance to handle all checks and spot potential issues early. If you ever need assistance, we offer reliable Fence Repairs Melbourne services. Proper maintenance ensures your investment provides years of trouble-free operation and security.
Secure a Flawless Finish with Professional Installation
As this guide shows, a successful swing gate installation is a complex project where precision is key. From setting posts in concrete to calibrating safety sensors, every step demands expertise.
While a DIY approach seems cost-effective, mistakes like poor foundations or incorrect hinge selection can lead to a sagging, binding gate that compromises your security. The hidden costs of specialised tools, wasted materials, and your own time add up quickly, often exceeding the initial savings. More importantly, an improperly installed automatic gate is a serious safety hazard.
For a stress-free process and a result that delivers on security, durability, and aesthetics, trusting a professional team is the smarter investment. With over a decade of experience across Melbourne, MAKE Fencing has the local knowledge to handle any challenge our climate and terrain present.
We use high-quality materials and meticulous craftsmanship to ensure your gate performs flawlessly for years. You get more than an installation; you get peace of mind. We MAKE Fencing Solutions To Your Satisfaction.
Ready to improve your property with a perfectly installed swing gate? Contact our friendly team today for a free quote or explore our range of custom automated gate solutions. Let's create something exceptional together.
Frequently Asked Questions about Swing Gate Installation
How much space do I need for a swing gate?
You need enough clear, level space for the gate panel to swing through its full arc without hitting any obstructions like a parked car, garden bed, or wall. For a 12-foot single swing gate, you'll need at least 12 feet of clear space behind it. This is why dual gates are often preferred for larger driveways with limited swing room, as they require less depth for their swing arc.
Can a swing gate be installed on a sloped driveway in Melbourne?
Yes, but it requires careful planning. If your driveway slopes up towards your house, a standard inward-swinging gate may not work as it could scrape the ground.
Options include installing an outward-swinging gate (if space permits and doesn't obstruct public areas), using specialised rising hinges that lift the gate as it opens, or grading a small section of the driveway to be level at the gate's opening point. We always assess your specific site conditions to recommend the best solution.
How long does a professional swing gate installation take?
A typical professional swing gate installation can take 2-3 days from start to finish. The first day is usually dedicated to preparing the site, digging post holes, and setting the posts securely in concrete. The concrete then needs 24-72 hours to cure properly, depending on weather conditions and concrete mix.
Once the posts are solid, our team will return to hang the gate panels, install all hardware, and commission any automation system, which usually takes another full day. This phased approach ensures maximum stability and precise operation.